Thứ Ba, 24 tháng 7, 2012

AUTOLINK FOR BLOGGER - TỰ ĐỘNG CHÈN LINK VÀO CÁC TỪ KHÓA BLOGSPOT


Bạn có biết plugin " Tags Wikipedia " trong Wordpress? nó sẽ tìm kiếm trong bài viết của bạn bất kỳ từ nào giống như categories và tạo cho nó một liên kết đến categories này. Ví dụ, trong bài viết của bạn, có một categories hay label "abc"- Tags đơn giản, bạn sẽ thấy trong bài viết của bạn xuất hiện từ "abc" và tự động tạo cho nó một liên kết đến categories abc. 
Thủ Thuật Blogger 

xem  demo  SimplexBlognews demo here 
  nhìn vào mỗi bài viết ta thấy từ "Morbi" và  "nec" đều được tự động chèn link đến SimplexDesignblog .

Các bước  
1,Open  template  bằng trình soạn thảo .

2,tìm từ khóa </head>
 thêm dòng này  vào phía trước
<script src="http://dinhquanghuy.110mb.com/autotag.js" type="text/javascript"></script>
lưu ý save as về server hay host google file js này kẻo server này có ngày die không báo trước.
link dự phòng never die :))
<script src="http://webvn20.googlecode.com/files/autotag.js " type="text/javascript"></script>

3 tìm dòng  <b:if cond='data:blog.pageType == &quot;item&quot;'>
  và nhìn thấy dòng code  :
<p>
                                             <data:post.body/>                                
                                         </p>
thay thế bằng code sau
<p>
                                         <div expr:id='&quot;summary&quot; + data:post.id'>
                                             <data:post.body/>
                                         </div>        
                                         <script type='text/javascript'>
                                             highlightSearchTerms('nec',true,'http://simplexdesign.blogspot.com','summary<data:post.id/>');
                                             highlightSearchTerms('morbi',true,'http://simplexdesign.blogspot.com','summary<data:post.id/>');
                                         </script>                                        
                                     </p>

   trong đoạn code trên thì ,"nec" and "morbi" sẽ tự động thêm link sau :, "http://simplexdesign.blogspot.com"  .
muốn add thêm từ khóa chỉ cần chèn thêm dòng code sau:

highlightSearchTerms('text you want to add link',true,'link','summary<data:post.id/>'); 
   các script sẽ tìm  "text you want to add link"  trong bài  và thay  thế  bằng 1 link "link"  .

0

HIỆN TỔNG SỐ BÀI VIẾT VÀ NHẬN XÉT CÓ TRÊN BLOGSPOT


Chọn Layout > Page Elements > Add a gadget > HTML /Java script
 paste đoạn code sau vào :
<script style="text/javascript">
function numposts(json) { document.write('This blog has ' + json.feed.openSearch$totalResults.$t + ' posts'); }
function numcomments(json) { document.write(' and ' + json.feed.openSearch$totalResults.$t + ' Comments'); }
</script>
<script style="text/javascript">
function numposts(json) {
document.write('This blog has ' + json.feed.openSearch$totalResults.$t + ' posts');
}
function numcomments(json) {
document.write(' and ' + json.feed.openSearch$totalResults.$t + ' Comments');
}
</script>
<script src="http://www.atsuu.com/feeds/posts/default?alt=json-in-script&callback=numposts">

</script>
<script src="http://www.atsuu.com/feeds/comments/default?alt=json-in-script&callback=numcomments"></script>

Thay tên miền bằng blogspot của bạn  

0

Làm thế nào để các mát Rss biểu tượng xã hội cho Blog của bạn


Hi Guys, Hôm nay tôi sẽ dạy cho bạn Làm thế nào để mát Rss biểu tượng xã hội Blog.I của bạn đã được tìm thấy này Biểu tượng Thiết lập từ Source.You này có thể thấy các thử nghiệm trực tiếp của widget này dưới đây.


How Is it?.....Very Cool..No...Let's see How to Get This!

Thực hiện theo các bước dưới
  1. Login to your blogger Dashboard and go to Design --> Page Elements.
  2. Click on 'Add a Gadget' on the sidebar.
  3. Select 'HTML/Javascript' and add the code given below and click save.

<a href="http://www.facebook.com/pages/Blogger-Tricks-Tools/105350376211143" imageanchor="1" style="margin-left: 1em; margin-right: 1em;"><img border="0" src="https://blogger.googleusercontent.com/img/b/R29vZ2xl/AVvXsEgk9Pp9z_kedhJ6PVu94HNTshEhXsKo3z5h8W-XWKwbl5ckoqd3XNb6snkQPDOM5OYySLPFGkVfZycNOy61X_a6jacsWQcG0p7ASNnq53WOgbippeHeb_wlZ-N7Br-R_wdu__ez5ipH4Ng/s1600/facebook-30x43.png" /></a><a href="http://twitter.com/dulara1997" imageanchor="1" style="margin-left: 1em; margin-right: 1em;"><img border="0" src="https://blogger.googleusercontent.com/img/b/R29vZ2xl/AVvXsEguraZ3C44ogkY54JEtrIE8fCE8YpiDa92jDz3femr1KlM9fbdrKwWkecrzcSub4I2VVPlu8esq4mgwHbpprLT7vKtDYP4dtzV9f1A9nFDQSuD4ns9FJ80rxo2_R8WIlxIdqg5BQU_m6DM/s1600/twitter-30x43.png" /></a><a href="https://plus.google.com/114446013077851520115/" imageanchor="1" style="margin-left: 1em; margin-right: 1em;"><img border="0" src="https://blogger.googleusercontent.com/img/b/R29vZ2xl/AVvXsEiMPjzycejOXien2mp5FLXMlcPT2CRYxtkdxsH5EzZEQ5O9zU6vqyrBGjvBEayjqbpFMEK5UCU-NZdTkxD6pYro_KcDQx4PCyhQ_x7WqPigDT5ehnxqWfNSwF6Cr0bxizGo3twUC916F5w/s1600/googleplus-30x43.png" /></a><a href="http://feeds.feedburner.com/BloggerTricksAndTools" imageanchor="1" style="margin-left: 1em; margin-right: 1em;"><img border="0" src="https://blogger.googleusercontent.com/img/b/R29vZ2xl/AVvXsEjRPqV8IbRJLHYEeUNrXh6nXxzSpNY-R9YXmZUBrLkqk3FlixkxhPeSwpB14sJ1oDoMcj9kihB5ONxBXw0qCImCMsocBIIKfPPfGLQnKqAZ6JGsWOIWAuHpF9PHcyZqU6YI1gEskTQBoUY/s1600/rss-30x43.png" /></a>
Note-Please Make Sure To Change the links in blue to your social and feed links.
That's It...You're done.
Happy Blogging!

0

Bạn thích này Câu chuyện? - Email đăng ký Widget cho Blogger!


Hi Khách thăm thân mến của tôi .. Hôm nay tôi sẽ dạy cho bạn Làm thế nào để Thêm "Giống như câu chuyện này?" - Đăng ký Email Widget Đối với Blogger, Bạn có thể nhìn thấy một ảnh chụp màn hình của widget này từ trên picture.Let 'xem Làm thế nào để có được này!

Thực hiện theo các bước dưới

Đăng nhập vào Bảng điều khiển Blogger của bạn -> Thiết kế -> Edit HTML -> Đánh dấu vào Expand Widget Templates Box
Cuộn xuống và tìm tag <data:post.body/>.
Sao chép đoạn code dưới đây và dán nó chỉ sau khi <data:post.body/> tag và Save Template.

<b:if cond='data:blog.pageType ==
&quot;item&quot;'>


<style>


form.emailform{


margin:20px 0 0;


display:block;


clear:both;


}


.mbttext{


background:url(https://blogger.googleusercontent.com/img/b/R29vZ2xl/AVvXsEiEoMv4zftdxLfSTNlLUSubcZJPhkW0VZDTO1SJ5yDZk9wthtlsIj8B243ix2Rzight6Z70K7dbI79FZxUh568tcvWBKucjTNYu7wEJMhX37bbTUVNEK0TmhYUainw3yn31EWgjeXgDELnV/s28/w2b-mail.png)
no-repeat scroll 4px center transparent;


padding:7px 15px 7px 35px;


color:#666;


font-weight:bold;


text-decoration:none;


border:1px solid #D3D3D3;


-moz-border-radius: 4px;


-webkit-border-radius: 4px;


border-radius: 4px;


-moz-box-shadow: 1px 1px 2px #CCC inset;


-webkit-box-shadow: 1px 1px 2px #CCC inset;


box-shadow: 1px 1px 2px #CCC inset;


}


.mbtbutton{


color:#666;


font-weight:bold;


text-decoration:none;


padding:6px 15px;


border:1px solid #D3D3D3;


cursor: pointer;


-moz-border-radius: 4px;


-webkit-border-radius: 4px;


-goog-ms-border-radius: 4px;


border-radius: 4px;


background: #fbfbfb;


background: -moz-linear-gradient(top, #fbfbfb 0%, #f4f4f4
100%);


background: -webkit-gradient(linear, left top, left bottom,
color-stop(0%,#fbfbfb), color-stop(100%,#f4f4f4));


background: -webkit-linear-gradient(top, #fbfbfb 0%,#f4f4f4
100%);


background: -o-linear-gradient(top, #fbfbfb 0%,#f4f4f4
100%);


background: -ms-linear-gradient(top, #fbfbfb 0%,#f4f4f4
100%);


filter: progid:DXImageTransform.Microsoft.gradient(
startColorstr=&#39;#FBFBFB&#39;,
endColorstr=&#39;#F4F4F4&#39;,GradientType=0 );


background: linear-gradient(top, #fbfbfb 0%,#f4f4f4 100%);


}


#doulike-outer {


-moz-border-radius: 10px 10px 10px 10px;


-webkit-border-radius: 10px 10px 10px 10px;


-goog-ms-border-radius: 10px 10px 10px 10px;


border-radius: 10px;


background: none repeat scroll 0 0 transparent;


border: 1px solid #D3D3D3;


padding: 8px;


-moz-transition: all 0.3s ease-out;


-o-transition: all 0.3s ease-out;


-webkit-transition: all 0.3s ease-out;


-ms-transition: all 0.3s ease-out;


transition: all 0.3s ease-out;


width:480px;


}


#doulike-outer:hover{


background: none repeat scroll 0 0 #FFF;


-moz-box-shadow: 1px 1px 2px #CCC inset;


-webkit-box-shadow: 1px 1px 2px #CCC inset;


box-shadow: 1px 1px 2px #CCC inset;


}


#doulike-outer td{


padding:3px 0;


}


</style>


<div id='doulike-outer'>


<div id='doulike'>


<table width='100%'>


<tbody>


<span style='font-style: italic; font-size: 30px;
font-family: arial,sans-serif, verdana; 
color:#FF683F;'>Do you Like this story..?</span>


<tr>


<td>


<div id='fb-root'/><script src='http://connect.facebook.net/en_US/all.js#xfbml=1'/><fb:like
font='' href='' layout='button_count' send='true' show_faces='false'
width='300'/>


</td>


</tr>


<tr>


<td align='left'> <p style='color:#666;
font-style:italic; margin:0px 0px 5px 0px; '>Get Free Email Updates
Daily!</p>


<form
action='http://feedburner.google.com/fb/a/mailverify' class='emailform'
method='post'
onsubmit='window.open(&apos;http://feedburner.google.com/fb/a/mailverify?uri=BloggerTricksAndTools&apos;,
&apos;popupwindow&apos;, &apos;scrollbars=yes,width=550,height=520&apos;);return
true' style='margin: 0pt;' target='popupwindow'>


<input name='uri' type='hidden' value='BloggerTricksAndTools'/>


<input name='loc' type='hidden' value='en_US'/>


<input class='mbttext' name='email' onblur='if
(this.value == &quot;&quot;) {this.value = &quot;Enter your
email...&quot;;}' onfocus='if (this.value == &quot;Enter your
email...&quot;) {this.value = &quot;&quot;}' type='text'
value='Enter your email...'/>


<input alt='' class='mbtbutton' title='' type='submit'
value='Submit'/>


</form>


</td>


<td><p style='color:#666; font-style:italic;
margin:0px 0px 5px 0px;  '>Follow
us!</p>


<a href='http://feeds.feedburner.com/BloggerTricksAndTools'
rel='nofollow' target='_blank' title='Suscribe to RSS Feed'><img
src='https://blogger.googleusercontent.com/img/b/R29vZ2xl/AVvXsEiYRDg0fd1lSbO2TBMTkVVYYuA_eToP6iG3IZf6WcCwU4nQ7-skVfcrWKxfg7cSmwiImQ4KfayAb2LovBB4Km6F-ebfUy5HbwqPvNGEjAqdViGRBl15QmvI5v19BMYD78eoWCPHgAneTN-q/s40/w2bRSS+.png'/></a>


<a href='http://twitter.com/dulara1997'
rel='nofollow' target='_blank' title='Follow us on Twitter'><img
src='https://blogger.googleusercontent.com/img/b/R29vZ2xl/AVvXsEi7FP_7ahdAGWUPxXYqUtyOtb101Ley2M9MJvj4lY33iKmuryfs68PJIzA5qOVW78yshF6IBBRu5fAyLPjxYqEse6sxB6wUK-K1-N6yLaIElUDYPN297ExIYWfFnU-cw04A9LnrauqDAWII/s40/w2bTwitter.png'/></a>


<a href='http://www.facebook.com/pages/Blogger-Tricks-Tools/105350376211143'
rel='nofollow' target='_blank' title='Follow us on Facebook'><img
src='https://blogger.googleusercontent.com/img/b/R29vZ2xl/AVvXsEgVDRvS0eAI1OyB_xDO8-nuhx3tbJ1t9gi3AWuKdnxFV6tC4kJcI0mDFiH5IqPUp2x02QQwu2IezMNgivnV2REZFUpLU0kGVgCZekypictNh4QKCoIgYns2a3GxeBGfPMcQLIm_dzDQySab/s40/w2bFaceBook.png'/></a>


</td>


</tr>


</tbody></table></div></div>


</b:if>


Please Make Sure To Make This Changes
  • Change BloggerTricksAndTools With Your Feedburner Title.
  • Change dulara1997 With Your Twitter Username.
  • Change http://www.facebook.com/pages/Blogger-Tricks-Tools/105350376211143With Your Facebook Fanpage URL.
That's It....You're Done...
Happy Blogging!

0

Làm thế nào để Thêm một Box đăng ký đẹp Email Dưới đây bài viết


Bây giờ tôi sẽ dạy cho bạn Làm thế nào để Thêm một Box đăng ký đẹp Email Dưới đây Posts.You có thể thấy một Ảnh chụp màn hình của widget này từ trên cao picture.Let 'xem Làm thế nào để có được này!

Thực hiện theo các bước dưới

1. Đăng nhập vào Bảng điều khiển Blogger của bạn -> Thiết kế -> Edit HTML -> Đánh dấu vào Expand Widget Templates Box
2. Cuộn xuống và tìm tag <data:post.body/>.
3. Sao chép đoạn code dưới đây và dán nó chỉ sau khi <data:post.body/> tag và Save Template.


<style>

#mbt-sub-box{background: -webkit-gradient(linear, left top, left bottom,
from(#333), to(#1a2638));;border:1px

solid #1A2638;border-radius:10px; margin-bottom:10px;padding:10px;text-align:center;background:
-moz-linear-gradient(top, #333, #1a2638)}
#mbt-sub-box h1{margin-top:5px;
color:#FFF;font-family:georgia;font-size:25px;margin-bottom:5px;padding:0;text-shadow:0
2px 3px #000;line-height:35px}
#mbt-sub-box input{background: -moz-linear-gradient(center
top , #FFFFFF, #EFEFEF) repeat scroll 0 0 transparent;border:medium
none;border-radius:10px 10px 10px
10px;font-size:14px;padding:10px;text-shadow:1px 1px 0 #FFF;width:280px;
color:#666; font-family:georgia; margin-bottom:5px;}
#mbt-sub-box .submit{background: -webkit-gradient(linear,
left top, left bottom, from(#369a18), to(#205f0d));background:
-moz-linear-gradient(center top , #369A18, #205F0D) repeat scroll 0 0
transparent;color:#FFF;cursor:pointer;font-weight:bold;margin-left:20px;text-shadow:0
1px 2px #000;width:100px; font-family:georgia; margin-left:5px;}
#mbt-sub-box .submit:hover{background:
-moz-linear-gradient(center top , #46B725, #205F0D) repeat scroll 0 0
transparent}
#mbt-sub-box .submit:active{background:
-moz-linear-gradient(center top , #46B725, #205F0D) repeat scroll 0 0
transparent}

</style>


<b:if cond='data:blog.pageType ==
&quot;item&quot;'>

<div id='mbt-sub-box'><h1>Đăng ký để có được Hướng dẫn miễn phí!</h1><form
action='http://feedburner.google.com/fb/a/mailverify' method='post'
onsubmit='window.open(&apos;http://feedburner.google.com/fb/a/mailverify?uri=BloggerTricksAndTools&apos;,
&apos;popupwindow&apos;,
&apos;scrollbars=yes,width=550,height=520&apos;);return true' target='popupwindow'><center>
<input name='email' onblur='if (this.value == &quot;&quot;)
{this.value = &quot;Nhập Địa chỉ email của bạn...&quot;;}' onfocus='if
(this.value == &quot;Nhập Địa chỉ email của bạn...&quot;) {this.value =
&quot;&quot;}' size='30' type='text' value='Nhập Địa chỉ email của bạn...'/> <input name='uri' type='hidden' value='VNF'/> <input name='loc'
type='hidden' value='en_US'/> <input class='submit' type='submit'
value='Theo dõi'/></center></form
action='http:></div>

</b:if>


Chắc chắn Thực hiện này thay đổi

0

Làm thế nào để một mẫu Pop-up Đăng ký Email Giống như Aweber


Hi  thân mến Khách thăm, Hôm nay tôi sẽ dạy cho bạn Làm thế nào để một Pop-up Theo dõi Hình thức Giống như Aweber.You có thể thấy một ảnh chụp màn hình của widget này từ trên picture.Let 'xem Làm thế nào để có được này!
Thêm CSS
  1. Đăng nhập vào Blogger của bạn Dashboard--> Design- -> Edit HTML-->Tick The Expand Widget Templates Box
  2. Cuộn xuống và tìm thấy ]]></b:skin>.
  3. Sao chép đoạn code dưới đây và dán nó chỉ trước khi ]]> </ b: skin> tag và Save Template

/* 
ColorBox Core Style:
The following CSS is consistent between example themes and should not be altered.
*/
#colorbox, #cboxOverlay, #cboxWrapper{position:absolute; top:0; left:0; z-index:9999; overflow:hidden;}
#cboxOverlay{position:fixed; width:100%; height:100%;}
#cboxMiddleLeft, #cboxBottomLeft{clear:left;}
#cboxContent{position:relative;}
#cboxLoadedContent{overflow:auto;}
#cboxTitle{margin:0;}
#cboxLoadingOverlay, #cboxLoadingGraphic{position:absolute; top:0; left:0; width:100%;}
#cboxPrevious, #cboxNext, #cboxClose, #cboxSlideshow{cursor:pointer;}
.cboxPhoto{float:left; margin:auto; border:0; display:block;}
.cboxIframe{width:100%; height:100%; display:block; border:0;}
/*

User Style:
Change the following styles to modify the appearance of ColorBox. They are
ordered & tabbed in a way that represents the nesting of the generated HTML.
*/
#cboxOverlay{background:#000;opacity:0.5 !important;}
#colorbox{
box-shadow:0 0 15px rgba(0,0,0,0.4);
-moz-box-shadow:0 0 15px rgba(0,0,0,0.4);
-webkit-box-shadow:0 0 15px rgba(0,0,0,0.4);
}
#cboxTopLeft{width:14px; height:14px; background:url(http://imgboot.com/images/cybersidh/controls.png) no-repeat 0 0;}
#cboxTopCenter{height:14px; background:url(http://imgboot.com/images/cybersidh/border.png) repeat-x top left;}
#cboxTopRight{width:14px; height:14px; background:url(http://imgboot.com/images/cybersidh/controls.png) no-repeat -36px 0;}
#cboxBottomLeft{width:14px; height:43px; background:url(http://imgboot.com/images/cybersidh/controls.png) no-repeat 0 -32px;}
#cboxBottomCenter{height:43px; background:url(http://imgboot.com/images/cybersidh/border.png) repeat-x bottom left;}
#cboxBottomRight{width:14px; height:43px; background:url(http://imgboot.com/images/cybersidh/controls.png) no-repeat -36px -32px;}
#cboxMiddleLeft{width:14px; background:url(http://imgboot.com/images/cybersidh/controls.png) repeat-y -175px 0;}
#cboxMiddleRight{width:14px; background:url(http://imgboot.com/images/cybersidh/controls.png) repeat-y -211px 0;}
#cboxContent{background:#fff; overflow:visible;}
#cboxLoadedContent{margin-bottom:5px;}
#cboxLoadingOverlay{background:url(http://imgboot.com/images/cybersidh/loadingbackground.png) no-repeat center center;}
#cboxLoadingGraphic{background:url(http://imgboot.com/images/cybersidh/loading.gif) no-repeat center center;}
#cboxTitle{position:absolute; bottom:-25px; left:0; text-align:center; width:100%; font-weight:bold; color:#7C7C7C;}
#cboxCurrent{position:absolute; bottom:-25px; left:58px; font-weight:bold; color:#7C7C7C;}
#cboxPrevious, #cboxNext, #cboxClose, #cboxSlideshow{position:absolute; bottom:-29px; background:url(http://imgboot.com/images/cybersidh/controls.png) no-repeat 0px 0px; width:23px; height:23px; text-indent:-9999px;}
#cboxPrevious{left:0px; background-position: -51px -25px;}
#cboxPrevious.hover{background-position:-51px 0px;}
#cboxNext{left:27px; background-position:-75px -25px;}
#cboxNext.hover{background-position:-75px 0px;}
#cboxClose{right:0; background-position:-100px -25px;}
#cboxClose.hover{background-position:-100px 0px;}
.cboxSlideshow_on #cboxSlideshow{background-position:-125px 0px; right:27px;}
.cboxSlideshow_on #cboxSlideshow.hover{background-position:-150px 0px;}
.cboxSlideshow_off #cboxSlideshow{background-position:-150px -25px; right:27px;}
.cboxSlideshow_off #cboxSlideshow.hover{background-position:-125px 0px;}
/*-----------------------------------------------------------------------------------*/
/* box popup
/*-----------------------------------------------------------------------------------*/
#subscribe {
font: 12px/1.2 Arial,Helvetica,san-serif;
}
#subscribe a,
#subscribe a:hover,
#subscribe a:visited {
text-decoration:none;
}
.box-title {
color: #2C2D31;
font-size: 20px;
font-weight: bold;
margin: 10px 0;
text-align: center;
}
.box-tagline {
color: #999;
font-size: 14px;
margin: 0;
text-align: center;
}
#subs-container {
padding: 35px 0 30px 0;
position: relative;
}
.box-side {
width: 170px;
text-align: center;
}
.box-side.left {
padding: 0 30px 0 15px;
border-right: 1px solid #ecedf3;
}
.box-side.right {
float: right;
margin-top: -223px;
margin-right: 10px;
}
.box-icon {
width: 72px;
height: 54px;
padding: 6px 0 0 0;
margin: 0 auto;
}
.box-icon a.rss{
display: block;
width: 70px;
height: 56px;
margin: 0 auto;
}
.box-icon a{
display: block;
width: 72px;
height: 54px;
}
.box-icon a.email img,
.box-icon a.rss img {
margin: -5px 0 0;
border: 0 none;
}
.box-side h4,
.box-side h4 a {
font-size: 14px;
line-height: 14px;
color: #f26535;
font-weight: bold;
}
.box-side h4 { margin: 20px 0 10px 0; }
.box-side h5 {
font-size: 11px;
color: #5e6066;
line-height: 18px;
margin: 0 0 20px 0;
}
a.sub {
background: url("http://imgboot.com/images/cybersidh/subscribebutton.png") no-repeat scroll 0 0 transparent;
color: #996633;
display: block;
height: 44px;
line-height: 29px;
margin: 0 auto;
text-indent: -999em;
width: 130px;
}
.box-side h4 a:hover {
color: #f26535;
}
#box-or {
background: #fff;
font-size: 12px;
font-weight: bold;
height: 25px;
line-height: 25px;
margin: -115px 0 0 208px;
position: absolute;
width: 20px;
}
a:link, a:visited {
border:none;
}
.demo {
display:none;
}


Adding The HTML
  1. Bây giờ, vào Blogger Dashboard --> Design --> Page Elements --> Add a Gadget --> HTML/Javascript
  2. Copy và Paste đoạn mã sau vào các tiện ích HTML / Javascript và bấm vào lưu.


<script src='http://ajax.googleapis.com/ajax/libs/jquery/1.5/jquery.min.js'></script>
<script src="http://sidharth12.googlecode.com/files/jquery.colorbox-min.js"></script>
<script type="text/javascript">
jQuery(document).ready(function(){
if (document.cookie.indexOf('visited=true') == -1) {
var fifteenDays = 1000*60*60*24*15;
var expires = new Date((new Date()).valueOf() + fifteenDays);
document.cookie = "visited=true;expires=" + expires.toUTCString();
$.colorbox({width:"480px", inline:true, href:"#subscribe"});
}
});
</script>
<!-- This contains the hidden content for inline calls -->
<div style='display:none'>
<div id='subscribe' style='padding:10px; background:#fff;'>
<h2 class="box-title">Never Miss Any Update From Us!</h2>
<h2 class="box-tagline">Enrich Your Inbox.[402+ Readers]</h2><br/>
<form style="border:1px solid #ccc;padding:3px;text-align:center;" action="http://feedburner.google.com/fb/a/mailverify" method="post" target="popupwindow" onsubmit="window.open('http://feedburner.google.com/fb/a/mailverify?uri=BloggerTricksAndTools', 'popupwindow', 'scrollbars=no,width=560,height=540');return true"><p>Enter your email address:</p><p><input type="text" style="width:140px" name="email"/></p><input type="hidden" value="BloggerTricksAndTools" name="uri"/><input type="hidden" name="loc" value="en_US"/><input type="submit" value="Subscribe" /><p>Delivered by <a href="http://feedburner.google.com" target="_blank">FeedBurner</a> | Powered By <a href="http://www.bloggertricksandtools.com">BTT</a></p></form>
<br/><h2 class="box-tagline">Subscribe us today and get Quality Articles for free.</h2>
</div>
</div>


Chắc chắn Thực hiện này thay đổi
Thay đổi các BloggerTricksAndTools Với ID Feedburner của bạn.
Đó là .... Bạn đang thực hiện ...
Hạnh phúc blog!

0

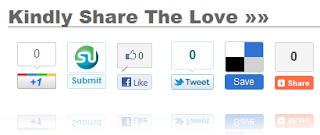
Thêm nút Chia sẻ xã hội Với Counter Đối với Blogger


Bây giờ tôi sẽ dạy cho bạn Làm thế nào để Thêm nút Chia sẻ xã hội Với Counter Đối với Blogger.You có thể thấy một ảnh chụp màn hình của widget này từ trên picture.Let 'xem Làm thế nào để có được này!


Thực hiện theo các bước dưới
  1. Log in vào Blogger Dashboard--> Design- -> Edit HTML-->Tick The Expand Widget Templates Box
  2. Cuộn xuống và tìm thấy <data:post.body/>
  3. Sao chép đoạn code dưới đây và dán nó chỉ sau khi <data:post.body/> tag và Save Template.
<div style='clear: both;'/> 
<b:if cond='data:blog.pageType == &quot;item&quot;'>
<div align='left'>
<p style='margin:0; border-bottom:1px solid #666666;'><font color='#666666' face='Arial Black' size='5'>Kindly Share The Love &#187;&#187;</font></p>
<table border='0' cellpadding='2' cellspacing='10'><tbody>
<tr>
<td style='padding-top:8px;'>
<g:plusone size='tall'/>
<script type='text/javascript'>
(function() {
var po = document.createElement(&#39;script&#39;); po.type = &#39;text/javascript&#39;; po.async = true;
po.src = &#39;https://apis.google.com/js/plusone.js&#39;;
var s = document.getElementsByTagName(&#39;script&#39;)[0]; s.parentNode.insertBefore(po, s);
})();
</script>
</td>
<td style='padding-top:8px; '> <script src='http://www.stumbleupon.com/hostedbadge.php?s=5'/>
</td>
<td style='padding-top:8px;'> <div id='fb-root'/><script src='http://connect.facebook.net/en_US/all.js#xfbml=1'/><fb:like font='' href='' layout='box_count' send='false' show_faces='false'/></td>
<td style='padding-top:8px;'><a class='twitter-share-button' data-count='vertical' href='http://twitter.com/share'>Tweet</a><script src='http://platform.twitter.com/widgets.js' type='text/javascript'/> </td>
<td>
<script src='http://ajax.googleapis.com/ajax/libs/jquery/1.3.2/jquery.min.js' type='text/javascript'/>
<script src='http://delicious-button.googlecode.com/files/jquery.delicious-button-1.0.min.js' type='text/javascript'/>
<a class='delicious-button' href='http://delicious.com/save'>
&lt;!-- {
url:&quot;<data:post.url/>&quot;
,title:&quot;<data:post.title/>&quot;

} --&gt;
Save on Delicious
</a>
</td>
<td>
<!-- AddThis Button BEGIN -->
<div class='addthis_toolbox addthis_default_style '>
<a class='addthis_counter'/>
</div>
<script src='http://s7.addthis.com/js/250/addthis_widget.js' type='text/javascript'/>
<!-- AddThis Button END -->
</td>
</tr>
</tbody></table></div></b:if>

<div style='clear: both;'/>


Đó là ..... Bạn đang thực hiện ...
Hạnh phúc blog!

0